Why do I need a cron job?
It is important to understand that WP Mailster is a part of WordPress which is a PHP based web application. That means: it can not act/run without being triggered and it can not run forever when triggered. This is a technical limitation coming from PHP, not from WP Mailster or WordPress.
Triggering means that somebody accesses the site. During the page load WP Mailster is handling the jobs to do (mail retrieving and sending). Thus mails can only be send/retrieved when somebody is browsing your site, otherwise the delivery is delayed or never done.
As your site might not be browsed every few minutes 24×7 we recommend you to use a cron job that opens the site periodically.
There are two main options available for dealing with your cron jobs:
The differences between the two are explained in the following.
Managed Cron Jobs – Mailster Cron Job Service
This is the easiest way to setup a cron job – we setup a cron job for you.
When you are a paying subscriber of WP Mailster, then you already have one cron job included that we will setup for your site.
You can do this by logging into your account at our site. There you will find a section where you can manage your cron jobs. Here you can also purchase additional cron jobs or extend the yearly subscription period.
The cron job services provides this features:
- Cron Job service for 1 year
- Triggers the WP Mailster installation on your WordPress site
- Site is triggered at least
- every 15 minutes (Basic Cron Job Service) or
- every 5 minutes (Power Cron Job Service)
- every single minute (Sprint Cron Job Service)
- Make WP Mailster deliver emails quick and reliable on low-traffic sites
- Suitable for all WP Mailster product versions (working with both lazy and dedicated cron job mode)
We offer the Mailster Cron Job Service as a managed service on subscription basis.
It can be booked independently although the following subscriptions are included when you purchase our products.
Included cron job service:
- WP Mailster (Free): None
- WP Mailster Club: Basic Cron Job Service (1 Site, 1 Year)
- WP Mailster Society: Power Cron Job Service (1 Site, 1 Year) – dedicated!
- WP Mailster Enterprise: Sprint Cron Job Service (1 Site, 1 Year) – dedicated!
The cron job service can work with all of WP Mailster’s product versions. It uses either the “lazy cron job” or the “dedicated cron job” mode that are described below.
If you run more than one WP Mailster installation you can purchase multiple cron job subscriptions as needed.
Own Cron Jobs – Set up a cron job on your end
In order to setup a cron job yourself, your hoster either needs to offer cron jobs as part of their hosting package, or you need need to have access to a URL-based cron job service like Easycron.com or Webcron.org.
There are two types of cron jobs:
- Lazy Cron JobThis type of cron jobs work by simply opening your WordPress site periodically.
During the site loads WP Mailster then does its activities (retrieving and sending emails). The downside of the approach is, that loading your site utilizes server resources as the web server renders a page that is never looked at. And, if you don’t follow our instructions below, it may cause delays for your users. - Dedicated Cron Job (WP Mailster Scoiety & WP Mailster Enterprise only)
This type of cron jobs has the advantage it does not cause page load delays at all.Furthermore, no unnecessary server resources are used. The different tasks types of the dedicated cron job are excellent to run WP Mailster in an optimized manner and ensure ultra-quick delivery.
If you can (based on your WP Mailster product edition), then you want to use the dedicated cron job mode given the above advantages.
Lazy Cron Jobs
This type of cron jobs work by simply opening your WordPress site periodically. So it basically means a program browses an URL of your site.
The (sub-)URL of the cron job is not important, as WP Mailster is working during the pageload and the content of the loaded page itself is not interesting.
Don’t slow down your visitors!
You want to point a lazy cron job always to the admin login screen (wp-login.php) to avoid too much traffic / false page hit statistics.
If you have setup your cron job to point to the login screen, then you can change the Trigger Source in WP Mailster’s setting to “Backend only”.
This avoids that your regular site visitors will have to wait longer for a page to load because WP Mailster is sending an email in the background …
So, in short: setup the cron job to use the URL like http://your-site.com/wp-login.php (replace http://your-site.com with your address and make sure to use HTTPS if applicable).
Please read our separate section on where to enter the cron URL.
If you have use a cron job targeted at your admin/login screen you can also avoid page load delays for your site vistors. This can be done by setting the system plugin “Mailster Email Forwarder” which is responsible for retrieving/sending emails to only execute by page accesses in the backend. The setting can be changed here:
- Navigate in WordPress’s admin area to WP Mailster’s settings
- Search for the setting “Trigger Source“:

- Change the setting to “Backend activity only“:

Dedicated Cron Jobs
This type of cron jobs have the advantage that they do not cause page load delays for site users at all.
Furthermore, no unnecessary server resources are used. We strongly recommend using them.
Dedicated cron jobs are only available in WP Mailster Society & Enterprise.
To use it you will have to change the “Trigger Source” for Mailster accordingly. The setting can be changed here:
- Navigate in WordPress’s admin area to WP Mailster’s settings
- Search for the setting “Trigger Source“:
- Change the setting to “Dedicated cron jobs only“:

You may also want to increase the “Max. execution time” setting, recommended is half of your PHP max. execution time.
Dedicated cron jobs work with special URLs.
You most probably will only need this one URL:
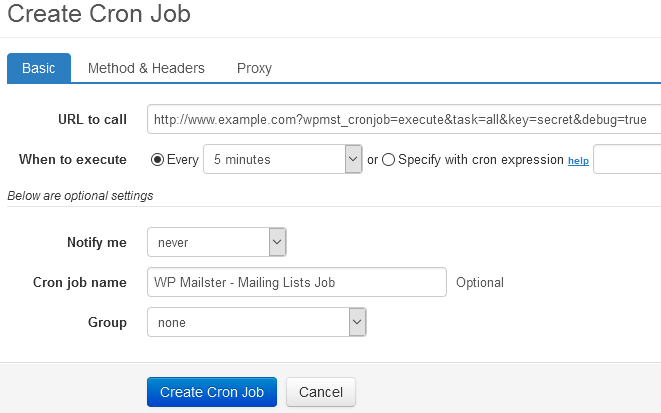
http://example.com?wpmst_cronjob=execute&task=all&key=secret&debug=true
The meaning of the parameters:
- wpmst_cronjob=execute: the general call to execute of Mailster’s dedicated cron job mode
- task=all: call the “all” cron job tasks, more on the different tasks below
- key=secret: this key has to be the same as the cron job key you provided in WP Mailster’s settings:

- debug=true: prints status information on the screen – an optional, but recommended paramater
Use only lower- and/or upper-case alphanumeric characters (0-9, a-z, A-Z) in your cron job key. Other characters may need to be manually URL-encoded. This is error prone and can cause the WP Mailster actions to never start.
Working with the all task is the recommended dedicated cron job setting and suitable for most setups.
However, there are more tasks available for dedicated cron jobs:
- all: sends and retrieves emails for all mailing lists. Recommended in most cases, but not recommended for big mailing lists or high traffic lists.
- fetchall: retrieves emails of the mailboxes of all active mailing lists
- fetch: retrieves the emails of the mailbox of one mailing list the emails in the mailbox.
You have to provide the mailing list to use with the “id” parameter (e.g. &id=1) - send: sends out mails in the send queue
While the task all is suitable for most cases, we recommend to use multiple cron jobs (e.g. one with the task fetchall and one with the send task) for big mailing lists (> 100 recipients) or high traffic lists.
Further examples:
Retrieve and send in one run, cron job key was set to “secret”:
http://example.com?wpmst_cronjob=execute&task=all&key=secret
Retrieve emails for all active mailing lists:
http://example.com?wpmst_cronjob=execute&task=fetchall&key=secret
Retrieve emails for mailing list with ID 3:
http://example.com?wpmst_cronjob=execute&task=fetch&id=3&key=secret
Work on emails in send queue:
http://example.com?wpmst_cronjob=execute&task=send&key=secret
Debug mode:
To check whether the cron job is successfully executed you can copy the cron job URL into the browser and append this: &debug=true.
Example (retrieves emails from the the mailing list with ID 1, the debug mode is active):
http://example.com?wpmst_cronjob=executetask=fetch&id=1&key=secret&debug=true
You should get an output like the following: 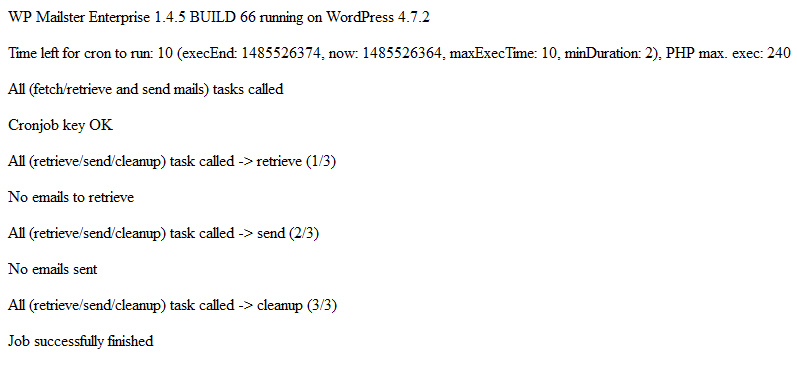
Finishing up
Let’s get back to setting our cron job.
- Take the recommended task=all-URL or one of the variants (if you have understood what they do)
- Make sure you have changed the example.com address to point to your WordPress site, but have left the query parameters there
- Make sure to replace the cron job key URL parameter with the key you have setup in WP Mailster’s settings
What to do with your cron job URL / Setting up the actual cron job
As already mentioned: there are different ways to setup a cron job. This depends entirely on the options available to you.
We will introduce you to the following methods:
- cPanel – create a cron job via your webhoster
- Root Server – create a cron job from the terminal
- Web Provider – use a web cron job provider
cPanel Cron Job
This method applies only if your webhoster offers you a graphical administration interface (like cPanel) with cron job functionality. Most interfaces look similar to the following screenshot: 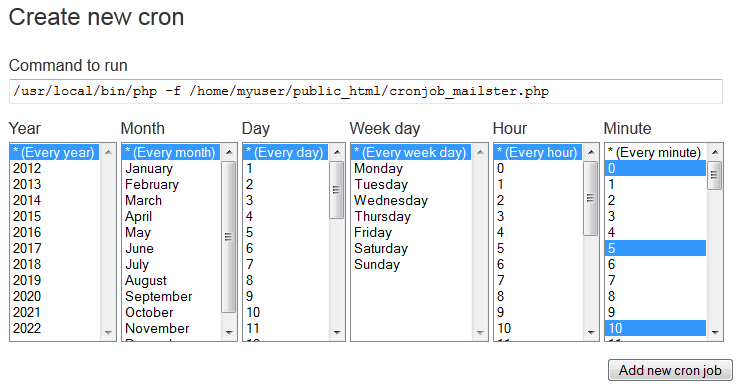
You specify the frequency of the cron job executing by selecting the appropiate options. We recommend to create a cron job that is run every 5 minutes.
Do this by selecting the every year/month/day/week day/hour option and by selecting multiple minutes in a 5 minute interval (e.g. 0/5/10/15/20/25/30/35/40/45/50/55).
Many hoster allow to only run local PHP scripts. Thus you create a PHP file named cron_job_mailster.php with the following content (here an example with a dedicated cron job URL):
<?php
$htmlData = file_get_contents('http://example.com?wpmst_cronjob=execute&task=all&key=secret&debug=true', 'r');
echo $htmlData;
exit;
?>
You need to pay attention what you insert as the command to run.
In the example given, the first part, /usr/local/bin/php on our server, is the path to the PHP executable. This is a little different for each webhosting environment – but in most cases well documented in the hoster’s setup guide.
On some servers it is enough to write php or php5 without an exact path.
The second part, the parameter -f, tells PHP to parse and run a file. It is optional and may be omitted.
The last part is the path to the file, relativ from the root directory (that you can access). A good way to figure out this path is to login via a FTP client and navigate to the root. From this root the whole path to the cron_job_mailster.php file has to be used for the cron job command.
Most cPanel offer a way to review the cron job result, either by logs or by emails. You should use this at first to see whether you get the desired output (as previously when you accessed the cron job URL with the &debug=true parameter with your browser).
Terminal Cron Job
This method applies only if you have command-line access to your (Linux) server and the suitable user rights.
As the first step create a file named cron_job_mailster.php, see the section above on what to put into the file.
Edit /etc/crontab with a text editor and add the following line: * * * * * php /path/to/your/cron_job_mailster.php
This is the scheme of the crontab file:
Minutes [0-59]
|   Hours [0-23]
|   |   Days [1-31]
|   |   |   Months [1-12]
|   |   |   |   Days of the Week [Numeric, 0-6]
|   |   |   |   |
*   *   *   *   * php /path/to/your/cron_job_mailster.php
The * means “every”. So our line makes the cron job run every minute (in every hour, day, month, year).
As this might generate too much unnecessarily server load we change it to “every 5 minutes”: */5 * * * * php /path/to/your/cron_job_mailster.php
For small, low traffic lists (e.g. announcement mailing lists) you might find an “every hour” setting more suitable: 0 * * * * php /path/to/your/cron_job_mailster.php
Basically every interval is possible. Many more examples on the crontab’s syntax can found on the web, e.g. on Wikipedia (see http://en.wikipedia.org/wiki/Cron).
An alterantive to use the PHP executable to trigger the site is using other applications that act like a web browser. This has the advantage that you don’t have to work with PHP scripting file.
Here is an option of a cron job that is executed every 5 minutes using the command-line tool wget:
*/5 * * * * wget -O – -q "http://example.com?wpmst_cronjob=execute&task=all&key=secret&debug=true" >/dev/null 2>&1
That’s the best option in order to not download/save anything while executing wget – otherwise you would save the returned HTML on each cron job execution
Note that you have more options in terms of command-line programs to use (e.g. lynx or curl). You have to see what is available and working on your host.
Web Provider Cron Job
There are many web cron job providers out there. For example Easycron.com and Webcron.org.
They all enable you to setup a URL-based cron job relatively easily.
Here an example based on Easycron’s user interface:
Beware the Caching
Some webhosters apply caching. That means your site is not always freshly generated when browsed. In that cases, the cronjob may not work or only work sometimes.
We recommend to speak with your hoster to either deactivate the caching for the specific cron URL, or, introduce a random/changing URL element to the cron URL. This requires depending on the cron type some technical skills.
You need to enter the URL and define the frequency (here every 5 minutes).

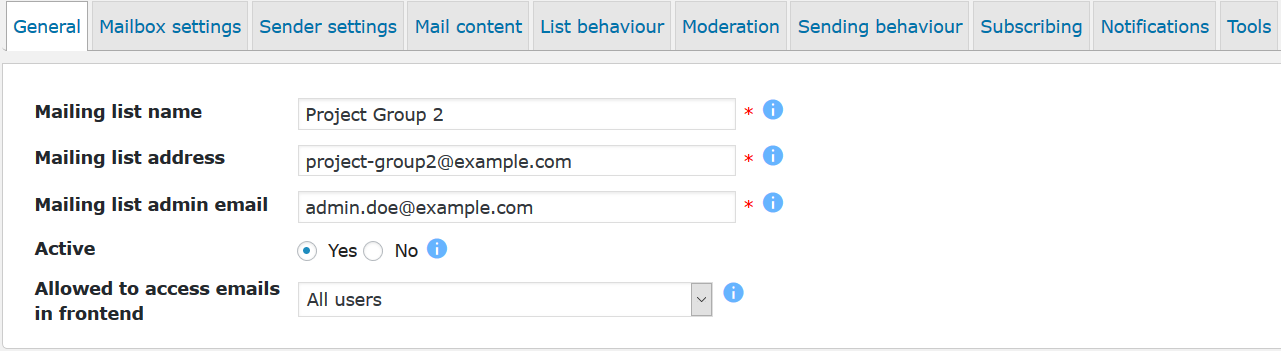

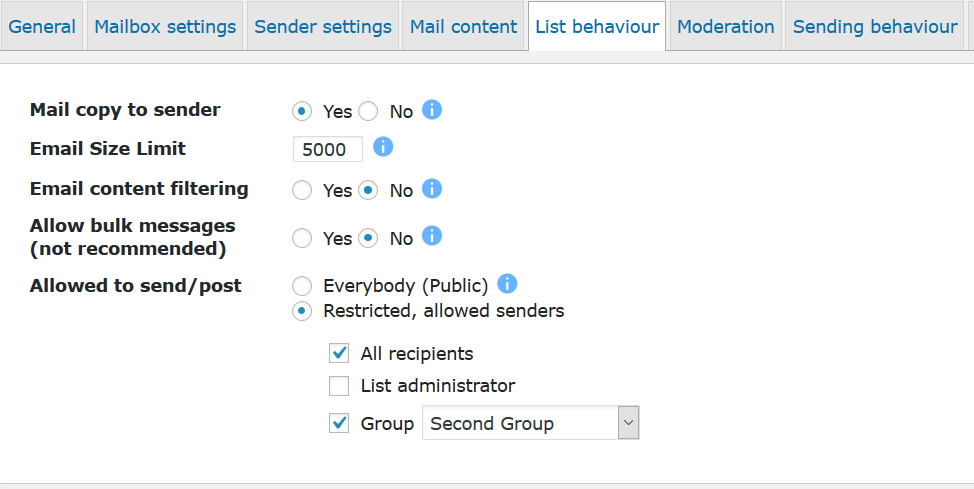 The settings in this tab largely determine how the list works and how it can be used.
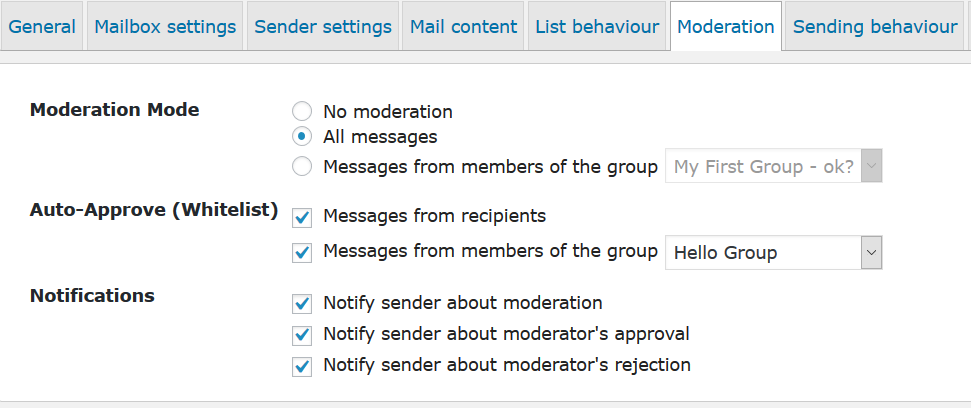 Use the moderation functionality
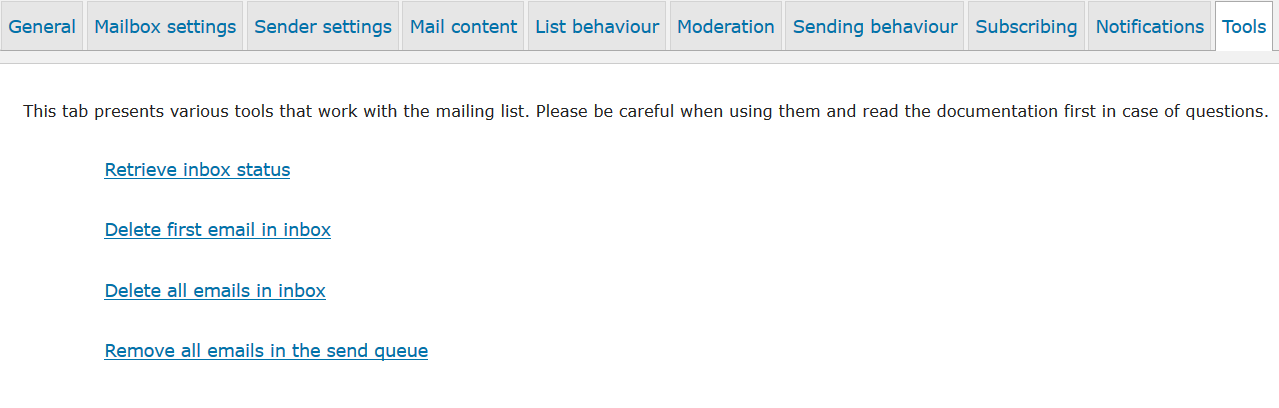 The tools section offers some specific functionality that you probably will not need every day. It is recommended to only use it when you know exactly what it does or if the support tells you to do so.