Users in WP Mailster

  • all WordPress (WP) users can be chosen as recipients, and additional recipients can be stored
  • users can be organized into groups
  • single users or whole groups can be added as recipients of a mailing list

Adding (non-WP) Users

Here is how to store recipients without having to create them as WP users.

Go to “WP Mailster” > “Users” > “Add New” (button at the top):

This will take you to the dialog to add a new, non-WP, i.e. WP Mailster user:

If you want to add WP Mailster users in bulk: please see our documentation for the CSV upload.

CSV Import / CSV Export

WP Mailster allows you to easily import/export user data.

You can find the CSV import and export functionality in WP Mailster’s dashboard:

WP Mailster menu entry


There is a section called Tools which links out to the CSV import and export:

WP Mailster CSV import and export tools


The CSV import dialog looks like that (make sure to complete both steps – below is only step 1 of 2):

WP Mailster CSV import

The CSV export dialog:

WP Mailster CSV export


Subscribe / Unsubscribe Shortcodes

Shortcode [mst_subscribe]

This shortcode [mst_subscribe] can be put in any page or post to show a form where the user can subscribe to your mailing list(s).
Without any customization, it looks like this:

You can customize the appearance and functionality of the subscribe shortcode with parameters.

Here is an example:

[mst_subscribe id="1" hideList buttonTxt="Join list"
requireTerms="yes" termsLabel="Read and understood the terms of services"
termsLinkUrl="https://example.com" ]

This changes the form like so:

In the above example the following parameters are used:

  • id
    With that a specific mailing list is selected for the subscribe form (to not show a dropdown with a choice). The number references the ID of the mailing list. You can look up the ID in WP Mailster’s table of mailing lists.
  • hideList
    This hides the name of the mailing list.
  • buttonTxt
    Replace the default “subscribe” button text with a custom call to action.
  • requireTerms
    Require the user to accept a checkbox before being able to subscribe.
  • termsLabel
    Only works combined with the requireTerms parameter described above. Customizes the text.
  • termsLinkUrl
    Only works combined with the requireTerms parameter described above. Customizes the terms of services URL.

You can find a full documentation of the parameters at the end of this article.

Shortcode [mst_unsubscribe]

This shortcode [mst_unsubscribe] can be put in any page or post to show a form where the user can unsubscribe from your mailing list(s).

Without any customization, it looks something like that:

You can customize the appearance and functionality of the unsubscribe shortcode with parameters.

Here is an example:

[mst_unsubscribe id="1" hideList ]

This changes the form like so:

In the above example the following parameters are used:

    • id
      With that a specific mailing list is selected for the unsubscribe form (to not show a dropdown with a choice). The number references the ID of the mailing list. You can look up the ID in WP Mailster’s table of mailing lists.
    • hideList
      This hides the name of the mailing list.
    • buttonTxt
      Replace the default “unsubscribe” button text with a custom call to action.

You can find a full documentation of the parameters at the end of this article.

Shortcode Parameters

The following parameters work for both subscribe (mst_subscribe) and unsubscribe (mst_unsubscribe) shortcodes.

ParameterDescriptionExample
add2GroupAutomatically add users to the WP Mailster user group provided, when they subscribe. Provide the group’s ID.
See also removeFromGroup.
[mst_subscribe id=”1″ add2Group=”2″ ]
buttonTxtText on the submit button
[mst_subscribe buttonTxt=”Crazy Button” ]
captcha (*)Use a captcha to secure your form against spammers and bots
[mst_subscribe captcha=”recaptcha” ]
cssCSS Prefix of all used CSS classes
[mst_subscribe css=”my_css_prefix_” ]
emailLabelLabel of the email field
[mst_subscribe emailLabel=”Your email address” ]
headerTxtHeadline of the form
[mst_subscribe headerTxt=”Our conversations – Join here!” ]
hideListHide the mailing list name, either use without a value or yes as the value (hideList=”yes”)
[mst_subscribe hideList ]


hideNameDon’t require a subscriber name, either use without a value or yes as the value (hideName=”yes”)
[mst_subscribe hideName ]
idID of the mailing list
[mst_subscribe id=”1″]
listLabelLabel of the mailing list name
[mst_subscribe listLabel=”Newsletter” ]
nameLabelLabel of the user name field
[mst_subscribe nameLabel=”Your first name” ]
smartHideHide subsribe form when already subscribed, hide unsubscribe form when not yet subscribed
[mst_subscribe smartHide=”yes” ]
submitTxtText to display after successful (un)subscription
[mst_subscribe submitTxt=”Thank you for subscribing!” ]
removeFromGroupAutomatically removes users from the WP Mailster user group provided, when they unsubscribe. Provide the group’s ID.
See also add2Group.
[mst_unsubscribe id=”1″ removeFromGroup=”2″ ]
requireTermsRequire terms of service approval.
Adds a checkbox and a text the user has to accept to (by clicking the checkbox) in order to subscribe.
See also the following parameter termsLabel, termsLinkLabel and termsLinkUrl.
[mst_subscribe requireTerms=”yes” ]
termsLabelLabel of the terms of service approval request
[mst_subscribe requireTerms=”yes” termsLabel=”Yes, I have read and accept the terms of service” ]
termsLinkLabelLabel of the link pointing to the terms of service
[mst_subscribe requireTerms=”yes” termsLabel=”Yes, I have read and accept the terms of service” termsLinkLabel=”(Our Policy)” ]
termsLinkUrlURL of the link pointing to the terms of service
[mst_subscribe requireTerms=”yes” termsLabel=”Yes, I have read and accept the terms of service” termsLinkLabel=”(Our Policy)” termsLinkUrl=”https://example.com/privacy” ]

(*) Some features are only included in our paid editions

DMARC

Dealing with DMARC

If you have never heard of DMARC (Domain-based Message Authentication, Reporting and Conformance) then you are not alone.

Normally this is something that only email providers have to deal with.

This changed in 2014 when several large email providers (most notable: AOL and Yahoo) made a policy change at their email servers. This was done in order to fight SPAM mails.

Unfortunately this had a negative side effect on us mailing list operators.

Not only WP Mailster, but every mailing list software is affected.

A simplified explanation of the DMARC policy change is given below. If you are interested in the bits and pieces we recommend to read this email from the IETF mailing list or Yahoo’s reasons given in an article.

The DMARC Issue

The issue is about where (from which email provider) an email is coming from, not to which email provider it will be sent to by WP Mailster.

Yahoo/AOL/others are essentially instructing any receiving domain (= the mail providers of your mailing list recipients) to reject mail that purports to originate from Yahoo/AOL/… domain, but that comes from someone else. They recognize this when the email structure gets altered (e.g. the sender address or the subject gets changed).

However that is exactly what mailing lists are there for: it takes an email coming from one email provider, processes it (where various modifications are done, e.g. footers are added) and forwards it to all mailing list members.

Hence mailing list emails are rejected which produces a bounce.

WP Mailster’s DMARC Workaround

The way we deal with DMARC is definitely a workaround, however it is the best we can do for now.

Beginning with WP Mailster version 1.7, the following settings were introduced for the general settings:

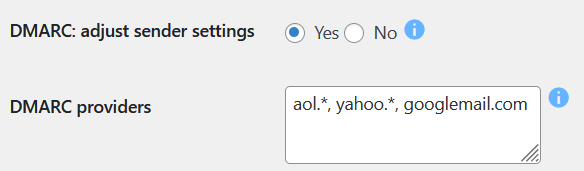
With this functionality WP Mailster will look at where the emails sent to the list are coming from and decides between “normal” email providers and the “DMARC relevant” ones. Nothing will change for the first group.

For the second group, WP Mailster will take ownership of the emails. That means it will replace the FROM email address (e.g. john.doe@yahoo.com) with the mailing list address (discussion@example.com).

By default this is done for AOL and Yahoo email addresses, but there is a setting where more email providers can be added if needed (see image above).

Shortcodes

Display a User Profile – Shortcode [mst_profile]

The shortcode [mst_profile] shows digest and subscription/unsubscription options to logged-in users.

Example

Display Past Messages – Shortcode [mst_emails]

The shortcode [mst_emails] shortcode displays all past emails in a chronological way.

ParameterDescriptionExample
lidUsed to select a mailing list by it’s ID (“lid” is short for “list ID”) so that you only the show the past emails of a certain mailing list
[mst_emails lid=1]
orderDetermines the chronological order of the emails displayed. Possible values are oldfirst and newfirst
[mst_emails order=oldfirst]
The shortcode [mst_emails] is only available in WP Mailster Society & Enterprise.

Example

Display Available Mailing Lists – Shortcode [mst_mailing_lists]

The shortcode [mst_mailing_lists] displays all mailing lists while adhering to the lists’  access settings.

From this overview, the user can view each list’s emails. Furthermore the subscription settings can be changed.

The shortcode [mst_mailing_lists] is only available in WP Mailster Society & Enterprise.

Example

WP Mailster – General Settings

WP Mailster General Settings in Admin Menu

You can find the general settings in WP Mailster’s submenu at the last entry.

It features all settings that apply on a global level, i.e. settings that apply for all mailing lists and control how WP Mailster behaves in general.

Note: the list below features all settings – some may not be available in your product edition of WP Mailster.


License

This section only shows for our paid product editions.

  • License Key
    In order to receive updates for your paid version you need to enter your license key here.
    You get the license key with your purchase confirmation email.In case you forget to add your license key, and update to a new plugin version, then you may inadvertently revert your installation to the free edition.
  • Allow this plugin to send anonymous data to the plugin author to validate my license key
    Recommended setting. Data sent back inludes the plugin version and WordPress version.

Plugin Trigger

  • Cron Job Key
    The cron job key is relevant when you setup a dedicated cron job (or have us setup a cron job for you).
    You choose this yourself. We recommend to only use alphanumerical characters.
  • Trigger Source
    WP Mailster is a part of WordPress which is a PHP based web application. That means: it can not act/run without being triggered and it can not run forever when triggered. This is a technical limitation coming from PHP, not from WP Mailster or WordPress. Triggering means that somebody accesses the site.Per default (with the setting “All Page Loads“), WP Mailster works in a “lazy cron job” fashion. That means it will do it’s email retrieving and forwarding during the page loads. So it is not an actual cron job. The big downside of this simple approach is, that this delay the page load for the visitors/admins. The second big disadvantage is that this will only ensure a timely and reliable email delivery on websites which a high number of visitors (at all times).
    Given this downsides, we generally recommend to use a cron job.There are two main approaches for this:
    1. Setting up a cron job that will periodically open the WordPress installation’s admin login screen (e.g. http://www.example.com/wp-admin/). Here the Trigger Source should be set to “Backend activity only“. This ensures timely email delivery although it may lead to page load delays for the WP admin, occasionally.
    2. Setting up a dedicated cron job. This is not available in all product editions.
    Here a special URL is used for the cron job. It is similar to the previously described admin-page-cron-job, with the additional benefit that there will not be any page load delays for the WP admin. Also, it runs more efficient than the other cron job types. In order to use it, a Cron Job Key has to be entered and the Cron Job has to be setup according to the URL that is displayed. Then, the Trigger Source can be set to “Dedicated cron jobs only“.

Mail Header & Content

  • Add subject prefix to replies
    Whether or not the reply ubject prefix (see setting below) should be put in front of replies automatically.
  • Reply Subject Prefix
    Prefix to be used for indicating replies to an existing email thread, e.g “Re: ” or “RE: “.
  • Undo Line Wrapping
    Some email servers automatically do a line wrapping after a fixed number of characters. This option removes those line breaks.
  • Date/Time format in WP Mailster
    The date/time format that is used to print dates into the email content (e.g. with the date placeholder) or in the email archive view. The format works analog to the PHP date (& time) format, see http://php.net/manual/en/function.date.php in order to find out the available format variations.
  • Date-only format in WP Mailster
    The date format that is used to print dates in the email archive view. The format works analog to the PHP date format, see http://php.net/manual/en/function.date.php in order to find out the available format variations.
  • From Email Address
    The emails forwarded from Mailster use this email address in the ‘From’ field.
    Note: this global settings is only effective when this is not overridden in the mailing list’s individual settings.
  • From Name
    The emails forwarded from Mailster use this name in the ‘From’ field.
    Note: this global settings is only effective when this is not overridden in the mailing list’s individual settings.
  • Mailster Email Header
    If activated, all mails forwarded/sent from Mailster have a fixed header field that tags them as originating from Mailster (useful for filter purposes).
  • Include mail body in bounced/blocked mail notifications
    The text of the bounced/blocked email can be included in the notification messages.
  • Message format to use within digests
    You can choose whether digests get sent out in HTML or plain text format.

Filtering / Blocking

  • Blocked Email Addresses
    Emails coming from one of the configured email addresses will not be forwarded. Here you can configure both complete email addresses as so called wildcard addresses. Separate the addresses with commas.
    Wildcard means, that only the local part (the name before the @-character) is checked for, not the domain of the email address. An example is the wildcard address john@* – that means that all email addresses that start with john@ will not be forwarded.
  • Words to filter
    When mail filtering is activated in the mailing list, mails containing on of these words in the subject or body are not forwarded. Separate the key words with commas.

Email Archive

  • Keep blocked emails for #days
    After the time period (in days), the emails are deleted to keep a smaller database.
  • Keep bounced emails for #days
    After the time period (in days), the emails are deleted to keep a smaller database.

DMARC

  • DMARC: adjust sender settings
    When an email comes from one of the given providers enforcing policy=reject, then automatically adjust sender settings to improve deliverability
  • DMARC Providers
    Email providers that have a DMARC policy with the setting “REJECT”. Here you can configure both complete domain names as well as so-called wildcard domains. Wildcard means, that only the hostname part (the name before the period character) is checked for, not the top-level domain of the email address. An example is the wildcard domain example.* – that means that all email addresses coming from a domain with “example” as the hostname are matched, examples: “example.com”, “example.net” and “example.co.uk”

Registration Plugin

The registration plugin is only available in the paid product editions. It enables you to have new, freshly registered users automatically added to your mailing list(s) and group(s).

  • Add user to mailing list(s) on registration
    Adds new users automatically to the mailing lists.
  • Add user to group(s) on registration
    Adds new users automatically to the (WP Mailster) user groups.

Captcha

The Captcha protection is only available in the paid product editions. The motivation is to prevent spam-bots from signing up through the subscribe forms.
We have integrated reCAPTCHA V2 for this purpose. In order to use it, you need to register your site at https://www.google.com/recaptcha/admin and retrieve your two keys from there.

  • reCAPTCHA Public Key
    The website key (public key) for your site, retrieved from Google’s reCAPTCHA admin page.
  • reCAPTCHA Private Key
    The secret key (private key) for your site, retrieved from Google’s reCAPTCHA admin page.
  • reCAPTCHA Theme
    The styling of the Captcha, there is a light and a dark version available – choose the one that fits better to your site’s design.

Misc.

  • Alternative Text Variables
    You can use alternative text placeholders. This is only recommended for the rare case when the text variables are incompatible with e.g. your mailing server.
    Please find the regular and the alternative text placeholders below:

    Regular PlaceholderMeaning of Text Variable / PlaceholderAlternative Text Variable / Placeholder
    {email}Sender email addressmailster_var_email
    {name}Sender namemailster_var_name
    {description}Sender descriptionmailster_var_description
    {date}Sending date/timemailster_var_date
    {list}Mailing list namemailster_var_list
    {post_email}Mailing list email addressmailster_var_post_email
    {admin_email}Mailing list administrator email addressmailster_var_admin_email
    {site}Site Namemailster_var_site
    {unsubscribe}Unsubscribe URLmailster_var_unsusbscribe
    {recip_email}Recipient email address*mailster_var_recip_email
    {recip_name}Recipient name*mailster_var_recip_name

* recipient based information is only available when the mailing lists are sending in the TO-sending-mode (i.e. one email per recipient). The recipient placeholders are not working in a BCC-sending-mode setting (where multiple recipients receive the same “physical email”).

Send Throttling

Send Throttling is only available in the paid product editions.

Many email providers enforce certain restrictions like the maximum count of emails per day/hour/minte that you are allowed to send out.
In order to avoid being temporarily blocked from sending, WP Mailster can auto-throttle the outgoing emails to not hit the given limits.

  • Send Limit (per hour)
    Maximum number of emails (across all mailing lists) that are to be sent per hour.
  • Send Limit (per minute)
    Maximum number of emails (across all mailing lists) that are to be sent per minute.
  • Wait between the sending of two emails
    Number of seconds to wait after sending out an email before the next email is sent.

Execution Times / Timeouts

The following timing related settings have a big impact on how WP Mailster performs. Please make sure to understand the setting(s) before making changes.

  • Open Mailbox Timeout
    Maximum time in seconds that opening a mailbox (i.e. connecting to the incoming email server) is allowed to take. Normally this setting does not need to be touched.
    There are two cases where changes may be valuable: first, if you are using an email server that is slow to respond, where sometimes a connection cannot be opened in the given time, then you might want to increase the number to 30 seconds. Second: if you have many mailing lists (5 or more) setup, it may be advisable to reduce the timeout to 5 – 10 seconds so that one slow email server reaction (durnig a connection attempt) does trigger the other mailing lists “to wait for too long”.
  • Minimal time between email retrievals
    This setting is a time in seconds, that determines how often WP Mailster (at maximum) will retrieve emails from the mailing lists’ inboxes. Note that this does not directly control how often checks are done since WP Mailster needs to be triggered (please read the section for the Trigger Source setting).
    The idea is to not use a too small number of seconds, so that not too much server load occurs. We recommend a value between 180 (3 minutes) and 300 (5 minutes).
  • Minimal time between email sending
    This setting is a time in seconds, that determines how often WP Mailster (at maximum) will send emails from send queue. Note that this does not directly control how often sending runs are done since WP Mailster needs to be triggered (please read the section for the Trigger Source setting).
    We recommend to use a setting that is smaller than the “Minimal time between email retrievals” setting, but not too small in order to avoid too much server load. We recommend a value between 30 (seconds) and 90 (seconds).
  • Minimal time between maintenance runs
    This setting is a time in seconds, that determines how often WP Mailster (at maximum) will do its internal maintenance. The maintenance are tasks that need to be done periodically, although not too often – for example deleting old bounced/blocked emails or old send reports.
    We recommend a setting between 3600 (1 hour) and 14400 (4 hours).
  • Max. Execution Time
    Time in seconds that WP Mailster will run at maximum during its activities (being email retrieving / email sending / maintenance runs).
    You should use a value relative to your server’s PHP maximum execution setting. We recommend a value between 50% and 75% of your PHP maximum execution setting – e.g. when your PHP maximum execution setting is 30 seconds, we recommend using a value between 15 and 22 seconds for WP Mailster’s Maximum Execution Time.
  • Minimal Operation Duration
    Time (in seconds) that is needed to complete an action like sending an email. Normally you should not change this setting from the default value.
    Slightly increase it when you experience timeouts. The value needs to be significantly lower than the Max. Execution Time. We recommend a value of 2 to 4 seconds.

Logging

Our support team may ask you to provide a debug log file.
The logging functionality is intended to support the root cause analysis for issues or bugs.

  • Logging Level
    The logging level controls how detailed WP Mailster will document it’s activities to a log file. While “Errors only” and “Normal” only produce few log lines, the “Debug” logging level will quickly produce large log files. That is why the Max. logging level (Debug) should only be used for a limited time (typically for reproducing an error scenario) and then the log level should be reverted back to “Normal“.
  • Log Destination
    Log entries are normally written only to a file which is the recommended option. In rare situations logging to a database may also be an option.
  • Force Logging
    Only activate this when you know what you are doing!
    WP Mailster will only attempt to write to a log file when the log directory (folder “log” in WP Mailster’s installation directory, depending on your setup, often: wp-content/plugins/wp-mailster/log) can be written to, i.e. the directory permissions allow it. When this setting is activated, WP Mailster will write to the log directory even though the permissions do not seem to allow it. This may lead to fatal errors.
  • Log file warning size limit (MB)
    WP Mailster will warn the admin when the log file exceeds the given limit (value in Megabytes). Default: 25 Megabyte.
  • Log database warning entries limit
    WP Mailster will warn the admin when the log database exceeds the given count of entries. Default: 1,000 entries.

Uninstall / Database Data

Sometimes it may be required to update/upgrade the plugin manually (i.e. not through the auto-updater built into WordPress). Then you obviously want to keep your data (like mailing lists, emails, users, …). This why you have the option to keep this data stored in the database during the uninstallation of WP Mailster.

  • Delete data when uninstalling the plugin
    When set to “No”, the WP Mailster database tables will not be deleted during uninstallation.
    Only set it to “Yes” in case you want to remove all your data during uinstallation.

Subscriber Widget

The easiest way to enable your site visitors to sign-up for your mailing lists, is to provide them with a subscribe form. WP Mailster’s subscriber widget can act as either a subsribe form or alternatively as an unsubscribe form.

Creating a Widget

  • In the WordPress admin section, go to Appearance > Widgets
  • Locate WP Mailster’s widget in the list of available widgets tut_012_add_user_hover
  • Click on Add Widget

All Widget Settings

Installing WP Mailster

Installing WP Mailster (Free) from WordPress.org

Installing the WP Mailster Free edition is just like any other WordPress plugin.
Navigate to your WordPress “Plugins” page, inside of your WordPress admin area, and follow these instructions:

  1. Go to “Add New”
  2. In the search field enter “WP Mailster”. Click “Search Plugins”.
  3. Select “WP Mailster” and click “Install Now”.
  4. Once installed, click “Activate”
  5. You will then find “WP Mailster” in your admin area menu

Now head on over to WP Mailster and start setting up your first mailing list!

Installing WP Mailster Club / Society / Enterprise

If you have already installed a version of WP Mailster, please go to Upgrading to a Premium Version below.
This section describes how to install a premium version of WP Mailster when you don’t have an existing WP Mailster installation, yet.
After purchasing a premium version, go to your account’s download section and download the plugin ZIP file.
Navigate to your WordPress “Plugins” page, inside of your WordPress admin area, and follow these instructions:

  1. Go to “Add New”
  2. Click “Upload Plugin”
  3. Use the browse button to choose the plugin ZIP you have previously downloaded and click “Install Now”
  4. Once installed, click “Activate”
  5. You will then find “WP Mailster” in your admin area menu

Upgrading WP Mailster Free to a Premium Version

This section describes how to upgrade WP Mailster Free to a premium version like Club / Society / Enterprise.
After purchasing a premium version, go to your account’s download section and download the plugin ZIP file.
Also, go to your account’s “My Licenses” section and get the license key of your purchase. You can also find this in the order confirmation email.
Then, go your existing WP Mailster installation, inside of your WordPress admin area, and follow these instructions:

  1. Go to WP Mailster’s “Settings”
  2. Check that the setting “Delete data when uninstalling the plugin” is set to “No”. If it isn’t, then change it to “No” and save the settings.
  3. Go to “Plugins” >> “Installed Plugins” and find “WP Mailster Free” in the list of your plugins
  4. Click “Deactivate”
  5. Then click “Delete”
  6. In the next dialog confirm the deinstallation
    (don’t be afraid to loose your data, when you have taken the measures described above)
  7. Go to “Plugins” >> “Add New” and click “Upload Plugin”
  8. Use the browse button to choose the plugin ZIP you have previously downloaded and click “Install Now”
  9. Once installed, click “Activate”
  10. You will then find “WP Mailster” in your admin area menu
  11. Go to “WP Mailster” >> “Settings” and enter your license key in the “License Key” text field
  12. Save the settings and you are all set!

Upgrading WP Mailster Club or Society to a higher tier Premium Version

This section describes how to upgrade WP Mailster Club or WP Mailster Society to a higher tier premium version like WP Mailster Enterprise.
After you have purchased a premium version, please go to your account’s “My Licenses” section and get the license key of your purchase.
Then, go your existing WP Mailster installation, inside of your WordPress admin area, and follow these instructions:

  1. Go to WP Mailster’s “Settings”
  2. Replace the existing license key with the new license key
  3. Save your settings
  4. Go to “Plugins” >> “Installed Plugins” and find your existing WP Mailster version in the list
  5. Click “Check for updates”
  6. You should be able to find an update
  7. Proceed updating to the offered version
  8. Your installation is now upgraded to the higher tier, congrats!

How To Deal With Send Errors

What are send errors?

The send errors are messages your email server is giving back to WP Mailster basically saying “I will not forward this message”. There are different reasons that emails get rejected from being sent.

An example is that too many emails were sent (per hour / day) so that the email quota of your hoster has been exceeded. Another example is that the hoster does not except emails with a certain content.

What does happen when send errors occur?

WP Mailster retries to send the email several times. If the send errors occur again, it will eventually stop sending.

The way this shows is the status in the email archive: a send error is indicated in the respective column:

In the above example you see that there is no check in the “Sent” column. That means the send error made WP Mailster stop sending this particular email. The remaining recipients (email instances) will be kept in the email queue.

What are my options with the current email?

You can try to continue the send process (in the hope that no new send error occur). To do so, open up the email in the email archive and click the button “Reset send errors, continue sending“.

Alternatively, you can skip the remaining recipients and remove them from the queue via the button “Remove remaining queue entries“.

How can I determine the exact cause for the send error?

You can dig deeper by opening the email in the email archive and open the “Send report” tab. Scroll down and see if you can locate the server error.

If that is not showing or only a generic message is recorded, you can enable the debug logging mode and try to reproduce the problem with the extended logging enabled. That usually results in more information being available in the send report.

Restoring Site Access / Error 500 / Blank Screen Issues

White Screen of Death? What is this error 500?

A 500 error is an internal server error. It usually means that there’s an error in the software running on the server or misconfiguration of the server.
The message “internal server error” is very generic and thus does not indicate which exact problem occurred. There are often situations where you only see a “white screen of death” that does not give you any hint what is going wrong.

How can I find out the root cause?

Depending on your webhoster there are different options available.

PHP Error Log

Many hosters provide the option to access PHP’s error log through their web interface (e.g. cPanel). Look for entries like “Fatal Error”.

Show Error in Browser

By default WordPress suppresses all errors and warnings. We can tell WordPress to show the problem by editing the wp-config.php file.
Note: this means changing PHP code. Be very careful when doing so as you might introduce errors here.

Set the WP_DEBUG value on like this:

define( 'WP_DEBUG', true );

That should print the error on the screen. More likely, it will also show non-critical notices and warnings. Since it may reveal a lot of interna about your site it is not always good to show the errors on a public live site.
But you can do something about that by setting two further configuration settings to:

define( 'WP_DEBUG_DISPLAY', false );
define( 'WP_DEBUG_LOG', true );

This will prevent the errors being shown on the screen and will tell WordPress to write the error to a log file in your content directory.

What should I do when this error is coming from WP Mailster?
What if you cannot login to the site?

Stop the Plugin via FTP

In case WP Mailster is the plugin making trouble: don’t worry, there is a way to login to the site by telling the WP Mailster plugin to stop it’s execution.

Create a text file called “no_mst_plg_exec.txt” or “no_mst_plg_exec” and upload it via FTP to the WordPress uploads directory (a subfolder of the WordPress content directory). It is not important what is in the file (it can be empty), but the filename has to be exactly one of the both mentioned variants.

After creating the file you should be able to login to access your site’s backend, again.

Then disable all your mailing lists.

If you already know that this problem is due to a very large email sitting in the inbox (PHP out of memory error): directly navigate to your mailing list’s settings, in the “Tools” section and use the link to delete the first email from the inbox. After fixing the error do not forget to reactivate the mail plugin.

If the error is caused by something else do reach out to our support.

What if I cannot access FTP, how can I disable the email forwarder plugin?

If you cannot access the site via FTP you need to go directly into the database (e.g. using phpMyAdmin) and deactivate the mailing lists there.

This can be done by opening the [prefix]_mailster_lists table. For all entries set the value of the “active” field from 1 to 0.

Add to cart